The LiftMaster hums, the wall control lights up, and the garage door still refuses to close. A resident may assume the motor has failed, while a property manager may already be preparing an avoidable service call. In many cases, the actual fault is a blocked infrared beam, a damaged sensor wire, lost programming, or a power problem left behind by an outage.
Effective garage door LiftMaster troubleshooting follows a decision tree. Safety sensors come before remotes, remotes come before force settings, and external power checks come before condemning the logic board. The same method helps homeowners, HOA teams, security installers, and property managers separate a simple field issue from a dangerous mechanical or electrical failure.
Table of Contents
- Isolating the Safety Sensor Circuit First
- Decoding LiftMaster Blink Codes and Error Indicators
- Performing the Wall Button and Sunlight Interference Test
- Programming Remotes and Adjusting Limit Force Settings
- Diagnosing Post-Power-Outage and Electrical Issues
- Upgrading to Cellular Keyless Entry Systems
- Essential Maintenance and When to Call a Professional
Isolating the Safety Sensor Circuit First
A stuck door often sends attention straight to the opener motor. That's usually the wrong starting point. The invisible safety beam between the photo eyes can prevent closing even when the motor, trolley, and wall button work normally.
A reliable technician isolates that circuit before changing settings or ordering parts. The photo eyes should sit about 6 inches above the floor, face each other, and show steady indicator LEDs. A dark or flickering LED points first toward alignment, obstruction, or wiring rather than a failed motor or logic board, as outlined in this LiftMaster error-code troubleshooting guide.
The four checks that prevent wasted adjustments
- Check both LEDs. The sending and receiving sensors should remain illuminated steadily.
- Clean the lenses. Remove dust, cobwebs, leaves, and condensation with a soft, dry cloth.
- Confirm alignment. Make sure the brackets haven't shifted and that both photo eyes point directly at each other.
- Trace the wire run. Inspect the wire at each bracket, along the wall, and at the opener terminals for cuts, pinches, loose screws, reversed polarity, or a short.
Re-aiming the sensors repeatedly doesn't solve a broken conductor. A disconnected or shorted wire can imitate misalignment, so continuity and terminal checks belong in the first diagnostic pass.
Practical rule: A sensor fault is a field-circuit problem until alignment, lenses, brackets, and wiring have all been cleared.
The safety emphasis has a long history. The Consumer Product Safety Commission safety history summarized by LiftMaster explains that U.S. openers manufactured after 1992 were required to include external entrapment protection, including infrared sensors, alongside the internal reverse mechanism. Older garage doors can still be safe when installed, tested, and maintained correctly, but many units made before 1993 lack the external sensors expected on modern systems.
For teams handling repeated access complaints, clear documentation saves time. SkipCalls helps service businesses organize missed-call problems while technicians are working under doors or on equipment.
Decoding LiftMaster Blink Codes and Error Indicators
LiftMaster blink codes are useful only when the pattern is read in context. A two-part code from the opener's LED or arrow indicators can identify the fault family, but it doesn't automatically prove that a component needs replacement.
The most important distinction is between a safety-sensor code and a motor-feedback code. Sensor-related signals should lead to a beam, bracket, or wire inspection. Motor-feedback signals require a different path involving power cycling, door balance, and moving-part condition.
Reading the sensor-related patterns
Independent LiftMaster code references map these patterns as follows:
- 1-1: The safety sensors may be blocked, misaligned, disconnected, or affected by an open or broken wire. Check the complete circuit, not just the photo-eye position, using the LiftMaster blink-code reference.
- 1-2: The sensor wires may be shorted or reversed. Inspect terminal placement and look for crushed insulation.
- 1-4: The sensors may have been briefly obstructed or misaligned. Look for a bracket that moves when the door vibrates or for an object crossing the beam.
A green receiving LED that blinks on a Security+ 3.0 installation indicates obstruction or misalignment. The LiftMaster Security+ 3.0 installation manual directs the operator to check the sensor beam for obstructions.
The practical error is replacing the board before checking the wire path. A sensor can look perfectly aimed while a staple, bracket screw, or terminal connection interrupts the signal.
When five flashes change the diagnosis
A 5-flash pattern points toward an RPM sensor problem or missing motor feedback, according to this LiftMaster five-flash troubleshooting guide. That pattern shifts attention away from the photo eyes.
Start with low-risk checks:
- Power-cycle the opener.
- Check whether the door moves freely and appears balanced.
- Lubricate appropriate moving parts.
- Test operation without standing beneath the moving door.
- Escalate to motor or logic-board diagnosis if the code returns.
A code is a clue, not a parts order. The opener's behavior, the door's movement, and the physical inspection must agree before a technician replaces a motor, RPM sensor, or control board.
Performing the Wall Button and Sunlight Interference Test
The wall-button test quickly separates a photo-eye safety fault from many drive-train problems. If the door closes only while the wall button is held continuously, the opener is usually being forced through a safety interlock. The likely problem is in the photo-eye path, not the motor or travel mechanism, as described in this garage door blinking-light troubleshooting guide.
Stand clear of the door and keep people, vehicles, and objects out of its path. Then use this sequence:
- Press the remote once. Note whether the door starts, reverses, or refuses to close.
- Hold the wall button continuously. If the door closes only during the hold, treat the sensor circuit as the primary suspect.
- Inspect both lenses. Remove dust, cobwebs, leaves, and moisture.
- Watch the LEDs. A blinking or dark receiver LED needs alignment and wiring checks.
- Test for sunlight interference. Shade the receiving sensor briefly, then re-aim it while watching whether the LED becomes steady.
- Recheck the wire run. Inspect brackets, staples, terminals, and any location where the wire may be pinched.
Direct sun or reflected glare can overwhelm the receiver at particular times of day. A sensor may appear normal during an indoor-style test and fail when sunlight reaches the lens at a low angle.
Why the manual hold test matters
The opener is designed to refuse an automatic close when it can't verify the safety beam. Holding the wall button changes the command, but it doesn't repair the underlying protection circuit. That makes the test valuable diagnostically, but it shouldn't become a daily workaround.
Safety warning: Never leave a LiftMaster operating through a defeated safety condition. Find the cause before returning the door to normal use.
If the sensors remain steady, the wiring passes inspection, and the door still stops or reverses, move beyond the photo eyes. Travel-limit drift, a cable-tension monitor, an obstruction condition, or an internal logic-board fault can produce similar symptoms even when the sensor lenses look clean.
Programming Remotes and Adjusting Limit Force Settings
A remote that stops working doesn't necessarily indicate an opener failure. Start with the remote battery, confirm that the wall control isn't in lock or vacation mode, and check whether the wall button still operates the opener. If the wall button works while several remotes fail, the issue may involve programming, range, interference, the receiver, or the logic board.
Pairing a remote safely
LiftMaster models differ, so the owner's manual remains the authority for button timing and compatibility. The general sequence is:
- Prepare the remote. Install a fresh battery and keep the remote close to the opener.
- Locate Learn. Find the opener's Learn or Program button near the motor head and antenna.
- Press and release Learn. Don't hold it randomly, because longer actions can affect stored programming on some systems.
- Press the selected remote button. Complete the pairing action within the opener's programming window.
- Wait for confirmation. A light response or click may indicate that the code was accepted.
- Test from a safe position. Confirm that the door moves smoothly and reverses correctly when appropriate.
A short operating range can come from a weak battery, a damaged antenna, interference, or a receiver fault. Reprogramming won't correct a damaged receiver, and clearing all stored codes should be reserved for situations where the access list must be rebuilt.
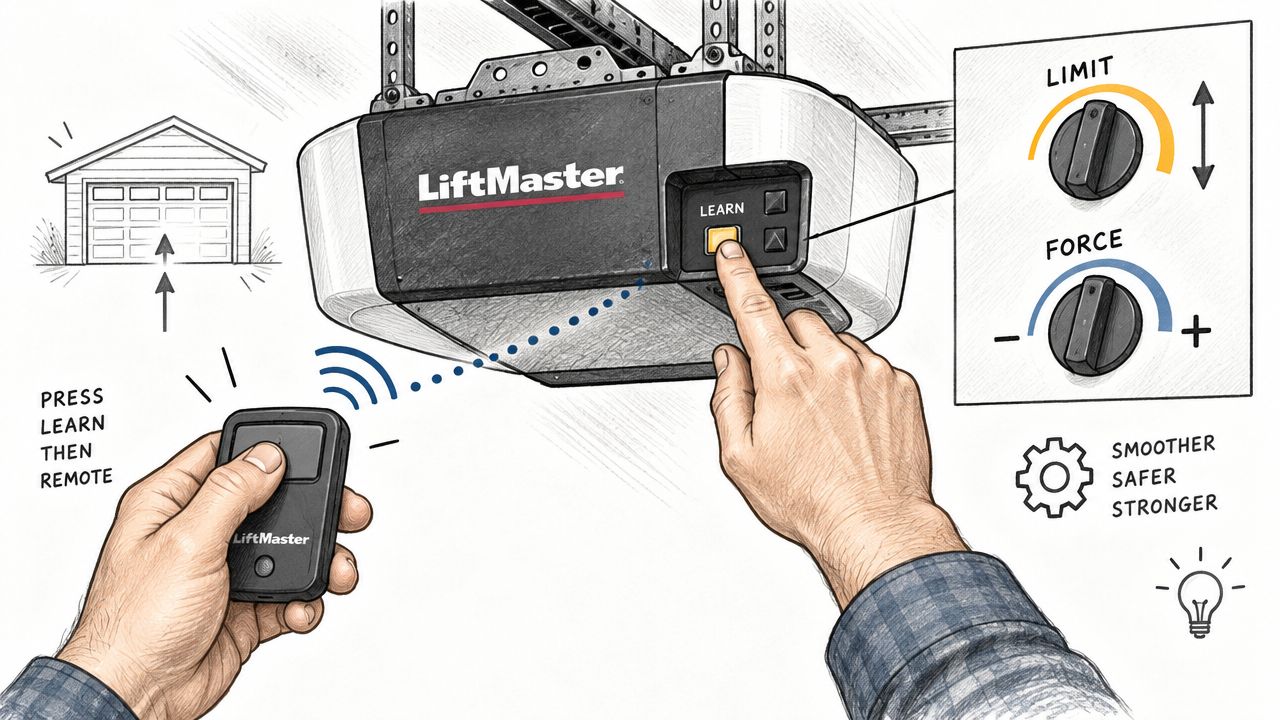
For model-specific pairing details, property managers and residents can use the Nimbio guide for garage reprogramming.
Checking balance before force settings
Force and travel settings should never compensate for a door that binds or weighs too much. Disconnect the opener using the emergency release, then lift the door manually while standing clear of its travel path.
A balanced door should move smoothly and remain open at eye level. If it drops, rises, feels unusually heavy, or binds in the tracks, the springs, cables, rollers, or other door hardware need professional attention.
Adjust force or limits only according to the model manual, then test the auto-reverse function. A setting that's too sensitive may reverse during ordinary movement, while excessive force can create an unsafe response to an obstruction.
Diagnosing Post-Power-Outage and Electrical Issues
A power outage can leave a LiftMaster with lost programming, a tripped GFCI, interrupted line power, or genuine surge damage. Treating every post-outage complaint as a remote-battery problem wastes time, while treating every interruption as a destroyed logic board creates unnecessary cost.
The fastest approach is to separate the external supply from the opener's memory and hardware.
A practical outage decision path
- No lights or response: Check the outlet, breaker, and any GFCI protection serving the opener. If power doesn't return after a safe reset, the problem is upstream or electrical.
- Opener powers up but remotes fail: Replace the remote battery and try careful reprogramming. Lost programming can follow an interruption without proving that the opener is damaged.
- Wall control works but remotes don't: Focus on remote programming, lock mode, range, receiver operation, and memory.
- Erratic behavior after restored power: Stop repeated resets and inspect for surge-related damage, especially if lights, displays, or responses remain inconsistent.
- Door moves but behaves abnormally: Return to the sensor, balance, travel, and force checks. An outage can expose a pre-existing mechanical weakness without causing it.
LiftMaster publishes its own garage door opener repair and maintenance guidance. A reset is useful for transient conditions, but it can't repair a damaged board, burned component, or failed power supply.
For a property manager handling several gates or garage entries, record which devices work after power returns. That simple comparison reveals whether the issue affects line power, the opener, or only individual remotes. The 2026 garage door fix guide can support a broader repair assessment when basic power and programming checks don't restore operation.
Don't open energized equipment or probe unfamiliar electrical components. A qualified technician should handle suspected surge damage, damaged wiring, repeated breaker trips, or an opener that remains dead after verified power is restored.
Upgrading to Cellular Keyless Entry Systems
Traditional remotes and keypads create a recurring access-control burden. Residents lose clickers, former occupants retain codes, and Wi-Fi-dependent devices can become unreliable when the network drops.
A cellular access controller takes a different route. Nimbio can retrofit existing electronic gates and compatible operators, including LiftMaster systems, so authorized users control entry through a smartphone app without relying on Wi-Fi. Cellular connectivity avoids local Wi-Fi drops, while hardware-agnostic installation can preserve the existing gate operator instead of requiring replacement.
Troubleshooting versus modernization
| Traditional access method | Cellular keyless approach |
|---|---|
| Physical remotes can be lost or shared | Digital credentials can be granted or revoked remotely |
| Keypad codes may be difficult to track | Administrators can manage visitor credentials and access history |
| Wi-Fi-based controls depend on the local network | Cellular connectivity bypasses Wi-Fi interruptions |
| Access changes may require on-site programming | Property managers can manage permissions through a dashboard |
For an HOA or gated community, remote visitor management matters as much as opening the gate. A manager can issue scheduled credentials, remove access when occupancy changes, and give residents a way to authorize visitors without distributing a shared PIN.
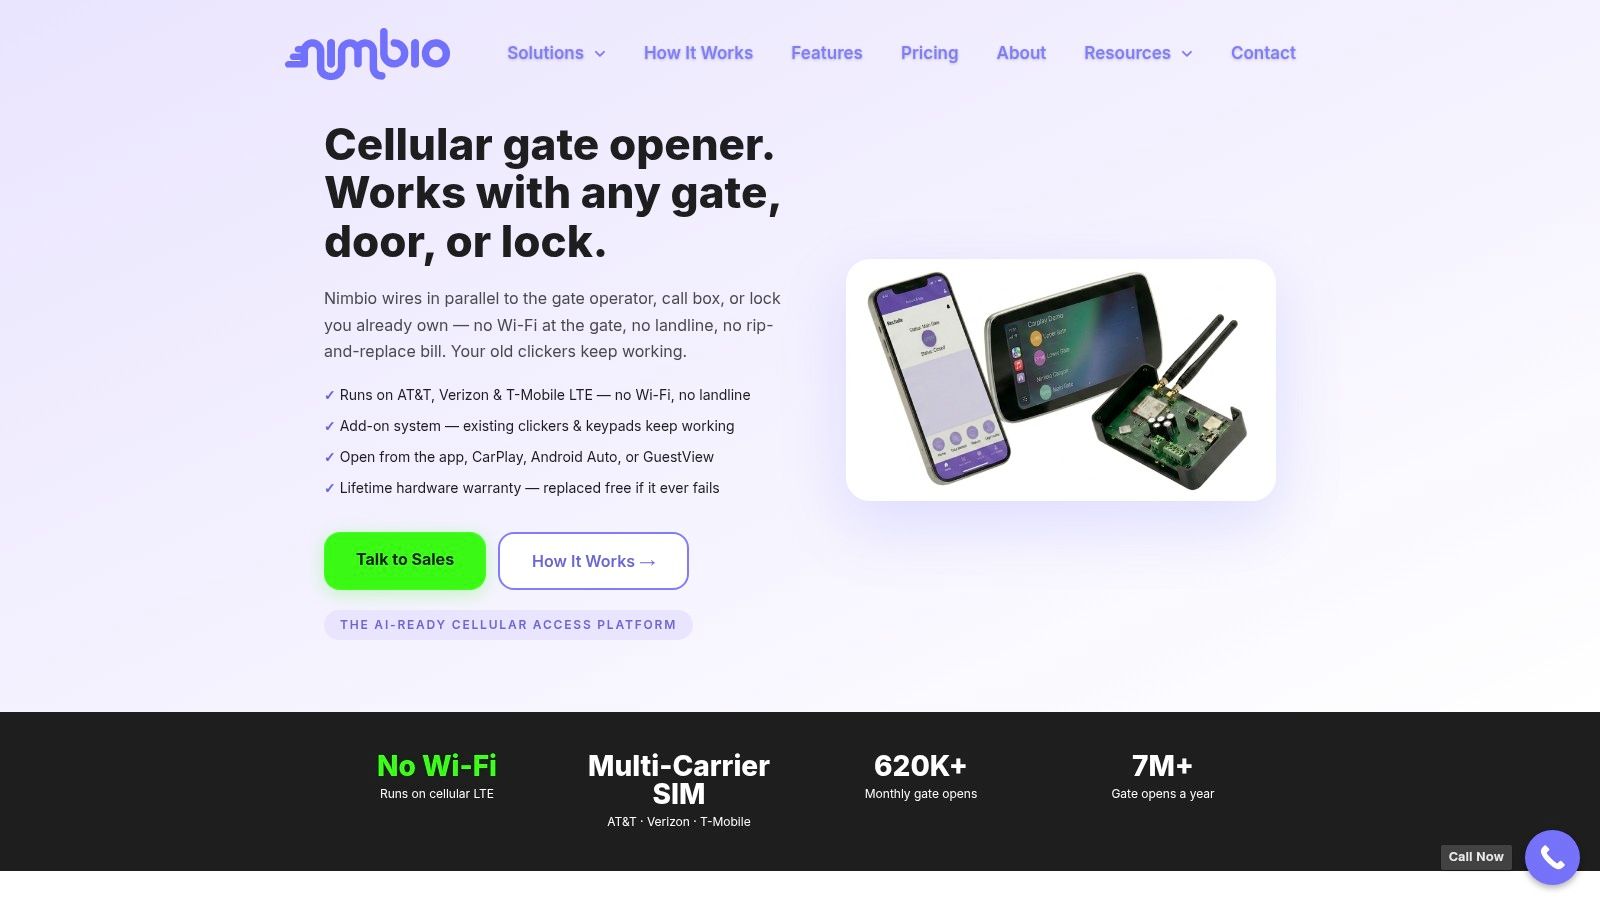
The upgrade doesn't eliminate mechanical maintenance. Sensors, springs, tracks, operator limits, and safety interlocks still require inspection. It does reduce the number of remote-programming and credential-management problems that repeatedly send installers to the same property.
For security installers, the retrofit model also supports phased modernization. Existing gate hardware remains in service while cloud-based access control adds mobile credentials, remote administration, and clearer accountability for a smart community.
Essential Maintenance and When to Call a Professional
Use a simple decision tree during maintenance. If the door will not close unless you hold the wall button, start with the sensor path and beam alignment. If the door is heavy, crooked, noisy, or difficult to move by hand with the opener disengaged, investigate the door hardware instead. This separation prevents a mechanical fault from being mistaken for an electrical one.
Early diagnosis also helps control repair costs. Opener repairs vary by fault and local market. A garage door repair cost guide provides current comparison points, but a technician still needs to inspect the actual door and operator before quoting work.
A maintenance checklist that catches trouble early
- Safety sensors: Clean the lenses quarterly, confirm steady LEDs, and keep the beam path clear.
- Door balance: Disengage the opener and lift the door manually. Smooth movement is expected. A heavy or crooked door needs service.
- Moving hardware: Lubricate suitable rollers, hinges, and other moving parts according to the manufacturer's instructions.
- Cables and brackets: Check for fraying, slack, shifting brackets, or damaged wire runs. Do not adjust components under spring tension.
- Auto-reverse: Test it monthly with the safe method specified in the opener manual.
- Access devices: Replace weak remote batteries and remove obsolete credentials when access changes. Follow this step-by-step remote replacement guide for the device work.
After a power outage, first check whether the opener works normally after power is restored. If it remains unresponsive, inspect the outlet, breaker, wiring, and wall control. Persistent failure, burning smells, visible scorching, or repeated resets suggest electrical damage and require professional diagnosis.
Spring adjustments, cable repairs, drum work, major gear replacement, and suspected circuit-board damage belong with trained technicians. Springs store dangerous energy, and poor door balance can turn an opener complaint into an injury risk.
Run this checklist once a season, then use the maintenance workflows in explore the blog only when they match the opener manual and site conditions.
Nimbio provides cellular, smartphone-based access control for electronic gates and building entries. Its digital credentials can be granted or revoked without replacing compatible gate hardware. Visit Nimbio to assess whether a retrofit could reduce recurring remote, keypad, and Wi-Fi access issues.